Microgreens are the fastest return a greenhouse produces. A tray sown today is harvested inside a fortnight, sometimes inside a week, and it occupies a bench rather than a bed. That makes them the ideal crop for the gaps between transplant runs, and the ideal thing to grow in the weeks when nothing else in a greenhouse is doing much.
They are also the crop most likely to fail in an unfamiliar way. Everything that makes them fast, dense sowing, constant surface moisture and warmth, is precisely what damping off needs. Growing microgreens well is largely about managing that one risk.
| Measure | Figure | Why it matters |
|---|---|---|
| Germination soil temperature | 65 to 75 degF | Most microgreen species germinate fast and evenly in this band, and higher temperatures increase damping off risk sharply. |
| Days to emergence | 2 to 4 days | At the optimum soil temperature, in a moist starting medium. |
| Optimum day temperature | 65 to 75 degF | Where growth is fastest. Above the range, specific processes start failing. |
| Optimum night temperature | 60 to 65 degF | The day to night difference controls stem elongation and plant habit. |
| Survives down to | 40 degF | Brief exposure on an acclimated plant, not a sustained figure. |
| Trouble above | 80 degF | Above this, growth becomes leggy and damping off risk in a dense wet stand rises quickly. |
| Target daily light integral | 6 to 12 mol/m2/day | Moles per square meter per day. Below this the crop holds rather than grows. |
| PPFD needed at 16 hours | 104 to 208 umol/m2/s | What a fixture must deliver at the canopy to reach that daily total. |
| Spacing under cover | Broadcast dense, roughly 10 to 30 g of seed per standard 1020 tray by species | Wider than outdoor spacing, because still air makes disease the limit. |
| Floor area per plant | A full 1020 tray is about 1.6 sq ft | Includes each plant share of shoulder and path space. |
| Sowing depth | Surface sown, pressed in, not buried | The crop is harvested above the medium, so seed sits on the surface under a weighted blackout cover instead. |
| Soil pH | 5.5 to 6.5 | Outside this band, nutrient availability rather than nutrient supply becomes the limit. |
| Days to first harvest | 7 to 21 days depending on species | From sowing, under cover, at good light. Winter timings run considerably longer. |
| Humidity preference | 0.4 to 0.8 kPa VPD during germination, higher after | Expressed as vapor pressure deficit, which accounts for temperature as relative humidity does not. |
How do you start microgreens under cover?
Fill a standard 1020 tray with an inch to an inch and a half of fine sterile medium, level it and firm it lightly. Depth matters less than levelness: an uneven surface produces an uneven stand, and in a crop harvested with a single cut that shows immediately.
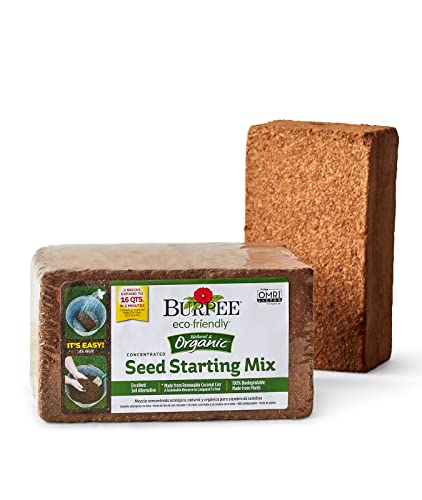
Use a fresh sterile medium every time. A fine coir seed starting mix is ideal, and reused medium is the single most common cause of a tray collapsing. This is one crop where reusing medium is never worth the saving.
Broadcast seed densely and evenly across the surface, then press it into contact rather than covering it. Density is far higher than any other crop, and it varies by seed size: a tray of sunflower takes several times the weight of a tray of broccoli. Weigh rather than eyeballing, and record what worked.
Cover for a blackout period of two to four days, with a solid cover and often a light weight on top. The darkness and the pressure together produce even germination and stems that push up uniformly rather than at different rates. Then uncover into full light.
What temperature does microgreens need in a greenhouse?
The working range is 65 to 75 degrees Fahrenheit by day and 60 to 65 at night, which is a comfortable greenhouse in the shoulder seasons and needs shading in summer.
Warmth speeds germination and increases damping off risk in the same motion, so this is not a crop where more heat is better. Above about 80 degrees a dense wet tray becomes a poor bet, and in high summer microgreens are often better grown on a shaded bench or indoors than in the body of a greenhouse.
At the cold end they simply slow down. Below about 55 degrees growth stretches out considerably, which is not harmful but removes the main advantage of the crop, which is speed. A propagation bench held at a steady temperature is the ideal environment.
Air movement is the most important environmental control. A dense stand of seedlings in still air holds a saturated layer at the medium surface, and that is where damping off begins. A small fan blowing gently across the trays, running continuously, changes the failure rate dramatically.
How much light does microgreens need?
Microgreens need very little light: 6 to 12 moles per square meter per day, which over a 16 hour photoperiod is roughly 104 to 208 micromoles per square meter per second at the canopy. That is around half what vegetable seedlings want and a fraction of what a fruiting crop needs.
That low requirement makes them the most practical crop to grow under supplemental lighting through winter, when a greenhouse is otherwise short of light for almost everything. A single fixture such as linked LED strips over a bench comfortably supports a rolling microgreen succession year round.
Light quality matters less than duration and consistency here, because the crop is harvested before it does much photosynthesis. What matters is enough light immediately after the blackout period to stop the stems stretching further, so uncover into good light rather than into a dim corner.
Spacing, support and training
There is no spacing in the conventional sense. Microgreens are broadcast at densities that would be absurd for any other crop, and the plants support each other as they grow, which is part of why the stand stays upright.
Density is the variable to calibrate. Too thin and the yield per tray is poor and the stems flop. Too thick and airflow at the medium surface disappears, which is the damping off condition again. Two or three sowings of a species is usually enough to find the right weight.
Species can be mixed in one tray only if they germinate and mature at similar rates. Mixing a three-day germinator with a seven-day one produces a tray that is half overgrown and half emerging on harvest day. Grow mixes as separate trays and combine after cutting.
Trays should be raised on a bench rather than sitting on the floor, both for airflow underneath and because a floor-level tray is the first thing slugs find in a greenhouse.
Watering and feeding
Water from below, always, once the seed has germinated. Overhead watering on a dense stand knocks seedlings flat, keeps the leaf surfaces wet, and drives damping off harder than any other single practice.
The standard method is a solid tray beneath the growing tray, filled with a shallow depth of water and allowed to be taken up by capillary action. A no-hole tray underneath a mesh tray is the classic arrangement, and capillary matting achieves the same on a bench holding several trays.
Before germination, a fine mist on the surface is appropriate and often necessary to keep the seed in contact with moisture. A hand mister is enough at this scale, and the misting stops the moment the seed has germinated.
Do not let the bottom tray sit full continuously. Fill it, let the medium take up what it needs over an hour or two, and tip out the remainder. A tray standing permanently in water is anaerobic at the base and will rot.
No feeding is needed. The crop is harvested before it exhausts the seed reserves, and adding nutrient to a dense wet tray increases microbial growth without increasing yield.
What goes wrong with greenhouse microgreens?
| What you see | Usual cause | What to do |
|---|---|---|
| Seedlings collapse at the medium surface and the stand goes down in patches | Damping off, from dense sowing, constant surface moisture, warmth and still air | Fresh sterile medium every time, water from below, run a fan continuously, and reduce sowing density. |
| White fuzzy growth on the medium surface | Usually harmless saprophytic mould, but sometimes early damping off | Increase airflow immediately and reduce surface moisture. If seedlings start collapsing, discard the tray. |
| Fine white fuzz on the seedling roots themselves | Root hairs, which are normal and constantly mistaken for mould | Nothing. Root hairs are evenly distributed along the root and do not spread across the medium surface. |
| Tall pale stems that fall over when uncovered | Blackout period left too long, or insufficient light immediately after uncovering | Check under the cover daily from day two, and uncover into good light rather than a dim corner. |
| Uneven germination across the tray | Uneven medium surface, uneven seed distribution, or uneven moisture | Level and firm the medium properly, broadcast more carefully, and weight the blackout cover evenly. |
| Seed hulls stuck on the leaves at harvest | Common in sunflower and beet, and usually a moisture or weighting issue during germination | Weight the blackout cover more heavily, which encourages the seedling to push the hull off as it lifts. |
| Small dark flies over the medium surface | Fungus gnats, whose larvae need constantly wet medium | Water from below only, let the surface dry between waterings, and use sticky traps laid flat on the medium. |
| Sour smell from the tray | Anaerobic conditions at the base, from a tray standing permanently in water | Fill the bottom tray, let it take up what it needs, then tip out the remainder rather than leaving it standing. |
Which types work best under cover?
| Type | Suits | Note |
|---|---|---|
| Brassicas: broccoli, radish, mustard, kale | Beginners and fast turnover | Fast, reliable, small seeded and ready in 7 to 12 days. The easiest place to start. |
| Pea shoots | Yield per tray | Large seed, high yield and a substantial texture. Soak the seed before sowing and expect a heavier tray. |
| Sunflower | Flavour and substance | Excellent eating, and the most prone to hull retention, so weight the blackout cover well. |
| Beet and chard | Colour | Slower at 14 to 21 days, and each seed is a cluster producing several seedlings, so sow thinner than instinct. |
| Amaranth | Colour on a plate | Very small seed and slow, but the colour is unmatched and a little goes a long way. |
| Basil and coriander | Flavour rather than volume | Slow at 14 to 21 days and lower yielding, but far stronger in flavour than the same herbs at full size. |
Start with brassicas. Broccoli, radish and mustard germinate in two days, are ready in a week to ten days, tolerate a wide range of conditions, and are cheap enough that a failed tray costs almost nothing while you calibrate density and watering.
Buy seed intended for sprouting or microgreens where possible. It is sold untreated and by weight, which is what this crop needs, whereas garden seed is sold by count in small packets and is sometimes treated in ways unsuitable for a crop eaten whole at seedling stage.
Harvesting and what comes next
Harvest at the first true leaf, when the seed leaves are fully expanded and the first true leaf is just appearing. Earlier is acceptable and gives a smaller yield; much later and the stems toughen and the flavour becomes harsh.
Cut with a sharp blade just above the medium surface, in one sweeping motion across the tray. Sharp shears work for small quantities and a long sharp knife is faster across a full tray. A clean cut keeps far better than a torn one.
Harvest dry rather than wet. Cutting a wet stand produces greens that deteriorate within a day. Stop bottom watering the day before, let the foliage dry, and cut in the morning.
Do not expect a second cut from most species. Microgreens are a single-harvest crop, and the stubble left after cutting rots rather than regrowing. Pea shoots are the main exception and will give a smaller second cut.
Compost the spent medium and root mat, and start the next tray with fresh medium. The root mat is the most likely place for a pathogen to persist into the next sowing.
Equipment for growing microgreens under cover



Microgreens turn a greenhouse bench into a weekly harvest with almost no infrastructure. Sow into fresh sterile medium, water from below, keep air moving, and cut at the first true leaf. They are also the best way to keep a propagation bench earning its space in the weeks between transplant runs.