A seedling heat mat should always be paired with a thermostat, because an unregulated mat sits roughly 10 to 20 degrees F above ambient with no ceiling and will cook a tray of lettuce as readily as it germinates peppers. The VIVOSUN mat and thermostat set at roughly $34 is the pick for most growers. Target 75 to 85 degrees F soil for warm-season crops and no bottom heat at all for cool-season ones.
Warm-season target
75 to 85 F soil
Cool-season target
No bottom heat
Peppers at 80 F
About 8 days
Peppers at 65 F
About 21 days
Researched from published specifications and verified owner reviews · Updated 2026-08-16
Germination responds to soil temperature, not air temperature, and this single fact is the reason a heat mat changes propagation results more than almost any other twenty dollar purchase. Peppers in 65 degree F medium can take 21 days and emerge erratically. The same seed at 80 degrees takes about 8 days and emerges evenly.
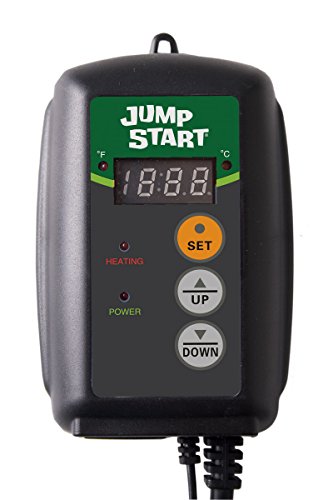
The important part of the recommendation is not the mat, it is the controller. The pick is the VIVOSUN mat and thermostat set at around $33.99, because a mat without a thermostat has no upper limit at all.
A propagation mat supplied with an inline thermostat and a probe that goes into the growing medium, which is the only arrangement that produces a controlled root-zone temperature rather than an uncontrolled offset. A bare mat runs roughly 10 to 20 degrees F above ambient with no ceiling, so the same mat that perfectly germinates peppers in a cool room will bake them in a warm one. The probe placement is what turns a heating element into propagation equipment, and buying the pair together costs barely more than the mat alone.
Jump Start Germination Station with Heat Mat, 72-Cell ($32.35). A complete germination station with tray, dome, mat and light in one unit, which is the simplest possible entry point for someone starting a first tray rather than assembling a bench.
Soil temperature by crop
The single most useful piece of propagation information is that different crops have very different optimum germination temperatures, and that several common ones are actively suppressed by bottom heat.
Figure 1. Optimum germination soil temperature by crop·14 rows
Figure 1. Optimum germination soil temperature by crop
Crop
Optimum soil temp
Days at optimum
Bottom heat?
Pepper
80 to 85 F
7 to 10
Yes, essential
Eggplant
80 to 85 F
7 to 10
Yes, essential
Tomato
75 to 85 F
5 to 8
Yes, strongly beneficial
Cucumber
80 to 90 F
3 to 5
Yes
Squash and melon
80 to 90 F
4 to 7
Yes
Basil
75 to 85 F
5 to 8
Yes
Okra
80 to 90 F
6 to 10
Yes
Onion and leek
68 to 77 F
7 to 12
Mild benefit
Broccoli and cabbage
65 to 75 F
4 to 7
Mild benefit, not needed
Lettuce
60 to 68 F
3 to 6
No, suppressed above 75 F
Spinach
55 to 65 F
5 to 10
No, strongly suppressed above 70 F
Peas
55 to 65 F
7 to 12
No
Carrot
60 to 70 F
10 to 17
No
Radish
55 to 70 F
3 to 6
No
Researched figures from published horticultural references. The final column is the practical point: bottom heat is transformative for warm-season crops and counterproductive for several cool-season ones. Lettuce and spinach both exhibit thermal dormancy, where germination is actively inhibited above a threshold, which is why a heat mat can produce a tray that fails entirely.
That last point is worth emphasizing because it surprises people. Lettuce and spinach exhibit thermal dormancy: above roughly 75 and 70 degrees F respectively, germination is not merely slower, it is actively inhibited. A grower who puts a tray of lettuce on the same mat as their peppers and gets no emergence has not received a bad seed lot. The full table is in the germination soil temperature chart.
The three tiers
Heat mats in three tiers
3 tiers · priced at the time of writing
Beginner
A first tray, where the goal is getting seed up rather than building a bench.
Tray, dome, mat and light in one box removes every assembly decision at once, which for a first attempt is genuinely valuable. It also has the correct fundamental design: the mat sits under the tray and the dome holds humidity, which are the two things germination actually requires. As a self-contained unit it can live on a kitchen counter without any rack.
The trade-off:
One tray of capacity, and typically no thermostat, so it runs at an uncontrolled offset above room temperature. That is workable in a room you keep at a stable temperature and unpredictable in one you do not.
Mat plus inline thermostat with a probe into the medium is the correct arrangement and it costs barely more than a bare mat. Setting an actual number rather than accepting an offset means the same equipment germinates peppers at 82 F and, with the setpoint changed, handles onions at 72 F. It also protects against the failure mode where a warm week bakes a tray.
The trade-off:
The probe has to be placed in the medium rather than laid on the mat, and probe placement is the one thing that can be got wrong. A probe under the tray reads mat temperature and holds the medium far cooler than the setpoint suggests.
A single well-built thermostat driving multiple plain mats is cheaper per tray and more consistent than mats with individual controllers, because all the trays sit at the same verified temperature. It is also the arrangement that scales: adding a fourth mat is buying a mat, not another controller. This is what the expert build uses with two plain mats.
The trade-off:
It controls one temperature across everything connected to it, so it cannot run peppers at 82 F and onions at 72 F simultaneously. Zoning by temperature means a second controller.
A propagation mat is a resistive heating element with no feedback. It produces a roughly constant heat output, and the resulting temperature is whatever that output produces given the ambient conditions. Manufacturers describe this as running 10 to 20 degrees F above ambient, which is accurate and also means the medium temperature is entirely determined by the room.
In a 60 degree F basement that gives 70 to 80 degrees F, which is good. In a 75 degree F spare room it gives 85 to 95, which is above the optimum for every crop in the table above and hot enough to damage emerging seedlings. The same mat, unchanged, produces both outcomes.
Two secondary effects compound it. A humidity dome traps heat as well as moisture, raising medium temperature further. And a mat under a tray that has dried out heats far more aggressively than one under a moist tray, because water in the medium is absorbing the energy as it evaporates. The failure case is therefore self-reinforcing: a drying tray gets hotter, which dries it faster.
Watch out
Probe in the medium, not under the tray
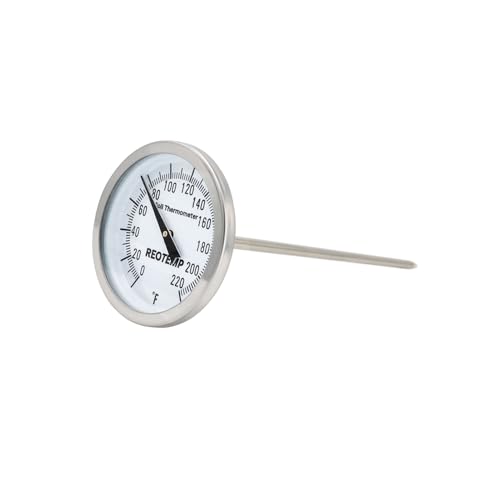
The thermostat probe belongs pushed into the growing medium of a representative cell, at seed depth, in the middle of the tray. A probe laid on the mat under the tray reads the mat surface, which runs considerably hotter than the medium, and the controller will therefore hold the medium far cooler than the setpoint. A probe taped to the outside of a tray reads air. Either error produces a result that looks like an equipment fault and is a placement fault. Verify once with a separate soil thermometer pushed into a different cell.
Turning the heat off, which is the step people skip
Bottom heat is a germination tool, not a growing tool. Once a tray has germinated, the mat should generally come off within a few days.
The reason is that warm roots plus insufficient light produces exactly the stretched, weak seedling that propagation is trying to avoid. Warmth accelerates growth; light supports it. When the first outruns the second, the plant elongates. Cooler medium after emergence, with strong light, produces the short, thick-stemmed transplant that establishes well.
Commercial propagators go further and deliberately drop temperature after germination, and many use a slightly cooler night than day, because the difference between day and night temperature influences stem elongation directly. A smaller day-to-night difference produces shorter plants. This is a genuine lever and it costs nothing.
The practical rule for a home bench: germinate warm, grow cool and bright. Move germinated trays off the mat and onto a cooler shelf under the lights, and use the freed mat space for the next sowing.
Mat placement and safety
Heat mats are low-wattage devices and are safe in normal use, but three practical points recur.
They should sit on a heat-tolerant surface rather than directly on a finished wooden bench or a plastic shelf, because sustained low heat over many weeks can mark or deform both. A sheet of insulation board under the mat is better still, since it directs the heat upward into the tray rather than downward into the bench, which improves efficiency noticeably.
They must not be folded or creased. The heating element runs through the mat in a continuous path and a sharp fold can damage it, creating either a dead zone or a hot spot. Roll for storage rather than folding.
They are used in a wet environment, with trays being watered above them, so the supply should be GFCI protected exactly as any other propagation electrical load should be. This applies indoors as much as in a greenhouse. The GFCI cord in the build lists covers this. Follow the manufacturer instructions, and treat this as researched general information rather than professional electrical advice.
How we chose
We did not thermally profile these mats, and any site claiming its own temperature mapping of four propagation mats is telling you a story. We compared published wattage and coverage area, whether a thermostat is included, probe type and lead length, mat construction and water resistance rating, and verified owner reviews weighted toward multi-season reliability.
The dominant consideration was simply whether the product includes control. A mat without a thermostat is an incomplete product for this application, and we ranked accordingly rather than treating temperature control as an optional accessory. The price difference between a bare mat and a mat-plus-thermostat set is small enough that there is no sensible case for buying the former.
On reliability, the failure mode that dominates owner reports across the category is element failure producing a cold zone rather than total failure, which is insidious because a partially working mat still feels warm. Mats with even element distribution and a genuine water resistance rating scored higher, since moisture ingress at the cable entry is the usual root cause.
The rest of the germination setup
What a heat mat works with
Bottom heat is one of four germination inputs. These cover the other three, plus the independent check that confirms the controller is telling the truth.
A dome holds moisture at the surface while roots establish. Tall 7.3 inch domes let a tray stay covered until true leaves are established rather than forcing an early uncovering.
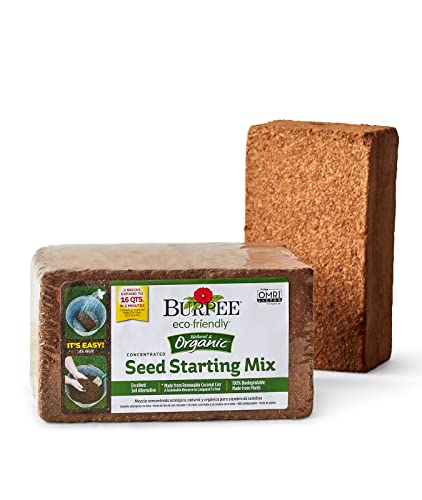
A fine, low-nutrient starting medium holds even moisture and drains freely. Potting compost is too coarse and too rich for germination and causes damping off.
The controller reports what it sees at its probe. A separate soil thermometer in a different cell is how you find out whether the probe is representative.
+- Do I need a thermostat with a seedling heat mat?
Yes, and it should be treated as part of the product rather than an accessory. A bare mat has no feedback at all: it runs roughly 10 to 20 degrees F above ambient with no upper limit, so the same mat gives an ideal 78 degrees F in a cool basement and a damaging 92 degrees F in a warm room. The price difference between a bare mat and a mat with a thermostat is small enough that there is no sensible case for the former.
+- What temperature should a seedling heat mat be set to?
75 to 85 degrees F medium temperature for warm-season crops such as peppers, tomatoes, eggplant, cucumbers and basil. Cool-season crops need no bottom heat at all, and lettuce and spinach are actively inhibited above roughly 75 and 70 degrees F respectively, a phenomenon called thermal dormancy. Setting one temperature for a mixed tray is a common cause of partial germination failure.
+- Where does the thermostat probe go?
Pushed into the growing medium of a representative cell, at roughly seed depth, in the middle of the tray. A probe laid on the mat under the tray reads mat surface temperature, which runs much hotter than the medium, so the controller holds the medium far cooler than the setpoint. A probe taped outside the tray reads air. Both errors look like equipment faults and are placement faults.
+- How long should seedlings stay on a heat mat?
Until germination, then off within a few days. Bottom heat is a germination tool rather than a growing tool: warm roots combined with insufficient light produce exactly the stretched, weak seedling propagation is trying to avoid. Germinate warm, then grow cool and bright. Moving germinated trays off the mat also frees the space for the next sowing.
+- Can I use a heat mat for lettuce or spinach?
No, and it will usually make things worse. Both exhibit thermal dormancy, where germination is actively inhibited above a threshold, roughly 75 degrees F for lettuce and 70 for spinach. A tray of lettuce on the same mat as a tray of peppers commonly fails to emerge at all, which is frequently misdiagnosed as a bad seed lot. Cool-season crops germinate well at ordinary room temperature.
+- Are seedling heat mats safe to leave on?
They are low-wattage devices designed for continuous use, but three precautions apply. Use GFCI protection, since trays are watered above them. Do not fold or crease a mat, because the heating element runs a continuous path through it and a sharp fold can create a hot spot or a dead zone. Place them on a heat-tolerant surface, ideally with insulation board underneath, which also improves efficiency by directing heat upward.
Working out the figures for your own house and season? The Greenhouse Build & Growing Planner is the
paid version of these pages: 8 printable worksheets you fill in with your own
numbers, plus the full PDF, $29.