Insulation is the only greenhouse upgrade that lowers the running cost permanently for a one-time spend. A bigger heater raises the bill every night it runs. A better envelope lowers it every night for as long as the house stands, and it also lowers the size of heater you need in the first place, which means the two decisions should be made in that order rather than the other way round.
The complication is that insulation and light are in direct conflict in a greenhouse in a way they are not in a house. Every insulating layer you add blocks some light, and in the shortest weeks of the year light is already the binding constraint. So the goal is not maximum insulation, it is insulation placed where it costs the least light.
Where the heat actually goes
Heat leaves a greenhouse three ways, and they are worth separating because the fixes are different.
Conduction through the glazing is the largest and the one everybody thinks of. It follows the standard form: area multiplied by U-factor multiplied by temperature difference. On a typical hobby house it is 60 to 75 percent of the total.
Air infiltration is leakage through door gaps, vent seals and panel joints. Published greenhouse guidance treats it as a multiplier on conduction, running from 1.0 for a new tight structure up to about 1.25 for an older film house with loose doors. That 25 percent penalty is a bigger number than the difference between 4 mm and 8 mm twin-wall polycarbonate, and it costs almost nothing to fix.
Perimeter and ground loss is heat conducted out through the base rail and the soil at the edges of the footprint, and it is typically 10 to 20 percent. It is the loss nobody addresses, and it is addressed with a strip of rigid foam board buried vertically around the outside of the perimeter, which is a job for build time rather than a retrofit.
The measures, in order of value per dollar
| Measure | Typical gain | Light cost | Effort |
|---|---|---|---|
| Seal and latch the door properly | Removes up to a 25 percent infiltration penalty | None | An hour, once |
| Bubble insulation on north panels | About R-1 added to roughly a quarter of the envelope | Almost none in winter | An afternoon, seasonal |
| Weatherstrip vents and panel joints | A meaningful part of the infiltration penalty | None | An hour, once |
| Perimeter foam board, buried | Cuts the 10 to 20 percent ground loss substantially | None | Half a day, permanent |
| Second film layer inside the whole house | Roughly doubles glazing R-value | Significant, 10 to 20 percent of light | A day, seasonal |
| Bubble insulation across the whole house | About R-1 on the full envelope | Substantial | A day, seasonal |
| Upgrading the glazing itself | Up to halving the U-factor | Moderate, depends on the material | A project, permanent |
| Thermal screen drawn at night only | Cuts night loss substantially with no daytime light cost | None if drawn only after dark | A day to rig, then daily |
The last row is the one worth thinking hardest about. A screen that is drawn across the roof after dark and pulled back at dawn gives night insulation at zero daytime light cost, which is the only way to escape the trade entirely. Commercial houses do exactly this with motorised thermal screens. At hobby scale a length of bubble film or fleece on a wire, drawn by hand in the evening, achieves a version of it for anyone prepared to do it daily.
Insulating the north wall, which is the free lunch
In the northern hemisphere, the north-facing side of a greenhouse receives no direct sun at all through the winter. It receives diffuse skylight, which is worth something, and it loses heat at exactly the same rate as every other surface. That asymmetry is what makes the north wall the correct first target.
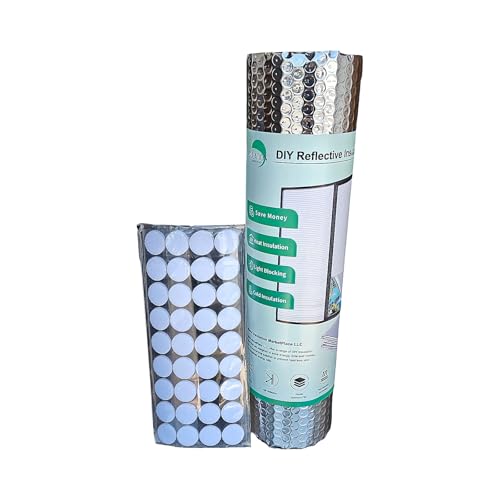
FONUNO Reflective Bubble Insulation Roll, 23.6 in x 10 ft taped to the inside of the north panels adds roughly R-1 to that surface. Better still, use the reflective-faced kind with the foil toward the inside, which bounces light back into the house rather than absorbing it, partly offsetting the diffuse light you gave up. On a 6 by 8 foot house the north wall and half the north roof plane are close to a quarter of the envelope, so this is a real reduction for a very small spend.
Fit it with the bubbles against the glazing and a small air gap where you can, because the gap is doing as much work as the material. Tape rather than staple, and expect to take it down in spring when light matters more than heat. A Reflective Double-Bubble Insulation Roll, 16 in x 10 ft ($9.95) covers a smaller area and suits doing the door and the gable ends only.
Sealing, which is where the easy money is
A hobby greenhouse leaks in predictable places. The bottom of the door, the vertical gap along the latch side, the roof vent when closed, the joints between panels, and the gap between the base rail and the ground.
- The door. Most kit doors are a sliding panel in a channel with several millimetres of clearance all round. Adhesive foam or brush strip along the vertical edges and a brush sweep at the bottom transforms it. A Shed and Greenhouse Door Hardware Kit with T-Handle Lock ($39.99) that lets the door close against a stop and latch positively does more than any strip on its own, because a door held shut is what makes a seal work.
- The roof vent. Check it actually closes flush. Many kit vents rest on a lip with a visible gap, and adhesive foam on the frame closes it without stopping the vent operating.
- Panel joints. Aluminium tape along the outside of a joint that whistles is unglamorous and effective. Do not tape the bottom of twin-wall flutes, which need to drain.
- The base line. Soil or gravel banked against the outside of the base rail closes the gap between the frame and the ground, which on an uneven site can be the single biggest leak in the structure.
What insulation is worth in money
The saving depends on the size of the house, the target temperature and the climate, and it varies enough that a general figure is useless. What is general is the shape: halving the U-factor of a surface halves the heat lost through it, and the saving accrues every hour the heater runs.
Work your own numbers with the glazing heat loss calculator, which puts two envelope specifications side by side on the same house and gives a seasonal cost for each. Then check what the reduced load does to the heater you need with the heater BTU calculator, because the second saving is often larger than the first: dropping below the 1,440 watt continuous limit of a 15 amp circuit avoids a 240 volt supply entirely, and that is a four-figure saving in electrical work.
Insulation and sealing materials



Insulation reduces the heat you have to add. What to add it with, and how to control it, is covered in heating a greenhouse in winter, and the free version of the same idea is in passive solar and thermal mass.